

How To Invert Black To White In Photoshop
In this curt tutorial commodity Nosotros photo retouching house team testify how to Photoshop invert black and white only. We have learned higher up how nosotros can invert colors of an paradigm. What about inverting black & white? This is also possible. Not but is it possible, information technology is easy as well. Now we will know how Photoshop invert black & white.
Note : Yous can establish little flake different option on if you use Photoshop cc or Photoshop cs6, If you don't know about Photoshop cc vs Photoshop c6 unlike then you lot tin check other article too.
How to invert black and white in Photoshop 5 Steps
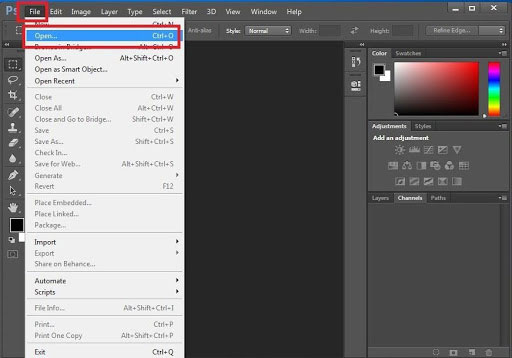
Step i: Open your image
To open an prototype, go to the "File" menu and then click the "Open" choice. Alternatively you tin open by pressing "CTRL+O" from the keyboard. Afterward that, get to your image location, select your prototype and then click the "Open up" button.
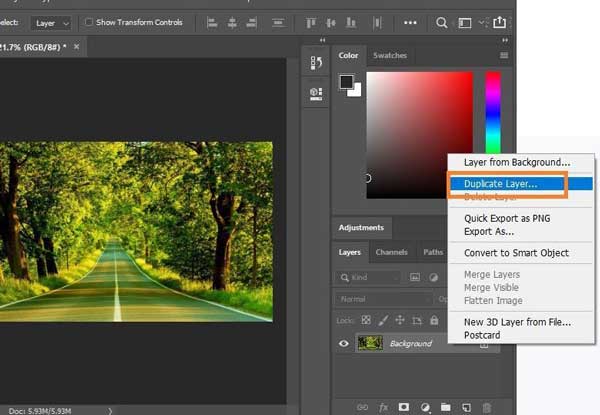
Footstep 2: Duplicate the layer
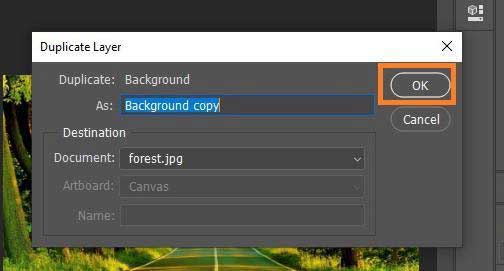
To practice that, right click on the original groundwork with the mouse then select the "Indistinguishable Layer" selection. Later on that a dialog box will appear. Now you can rename the layer. Afterward that, click the "Ok" button. You will see a new layer has been created in a higher place the original layer.
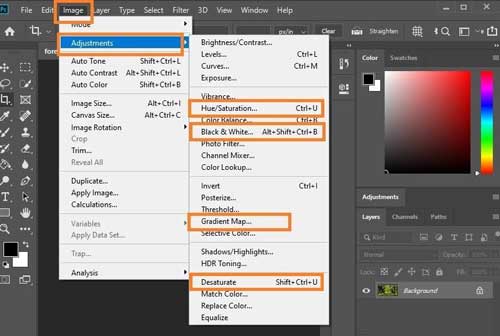
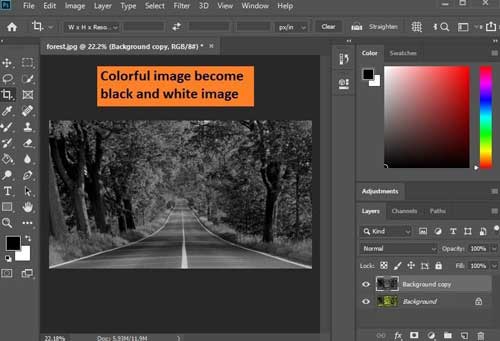
Step 3: Convert the paradigm into blackness and white
In this step we will make the image blackness & white. Nosotros can do information technology many means. Let'due south see the ways of converting the image into black & white prototype.
Blackness and White tool: First Get to the "Image" bill of fare option and then you demand to go to the "Adjustments" choice. From the adjustments option, select the "Black & White" option. From the pop upward box, click "Ok".
Or, Hue/Saturation tool: Go to the "Prototype" menu then become to the "Adjustment" option. From the Adjustments pick, select the "Hue/Saturation" option. From the popular upwardly box, set saturation to (-100) or slide the slider all the way to the left. And then, click the "ok" button.
Or, Gradient map tool: First press "D" from the keyboard and it will automatically reset the background and foreground colors to white and black. Then, Go to the "Image" menu and then become to the "Adjustments" option. From the adjustments option, select the "Gradient map" pick. From the pop up box, click "Ok".
Or, Desaturate tool: Go to the "Image" menu and so go to the "Adjustment" option. From the Adjustments selection, select the "Desaturate" selection.
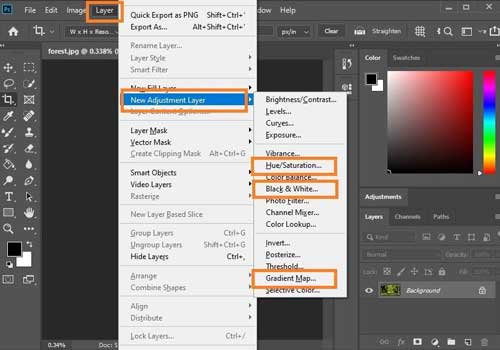
Or, Hue/Saturation adjustment layer: Go to the "Layer" menu then go to the "New Adjustment Layer" choice. From the New Adjustment Layer selection, select the "Hue/Saturation" selection. From the pop upwards box, click the "ok" button. Subsequently that, prepare saturation to (-100) or slide the slider all the way to the left. Now press "CTRL+SHIFT+ALT+East" from the keyboard to create a separate merged layer.
Or, Slope Map adjustment layer: Get-go press "D" from the keyboard and it will automatically reset the background and foreground colors to white and blackness. At present, Go to the "Layer" card and so go to the "New Adjustment Layer" option. From the New Adjustment Layer choice, select the "Gradient Map" choice. From the popular up box, click the "ok" button. Now press "CTRL+SHIFT+ALT+E" from the keyboard to create a separate merged layer.
Or, Black and White adjustment layer: Go to the "Layer" menu and then become to the "New Adjustment Layer" option. From the New Adjustment Layer option, select the "Black & White" selection. From the pop upwards box, click the "ok" button. Now press "CTRL+SHIFT+ALT+E" from the keyboard to create a split up merged layer.
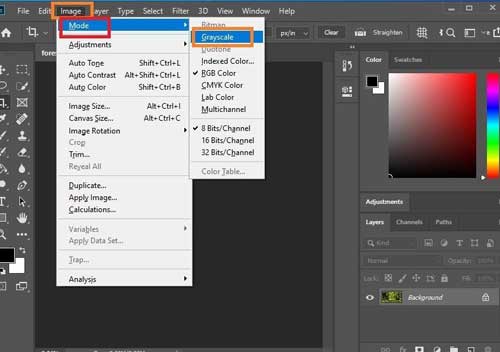
Or, Grayscale way: Go to the "Epitome" menu and then get to the "Mode" option. From the fashion pick, select the "Grayscale" option. From the popular up box, click "Discard". Before using the gray calibration mood method, you have to be very careful. Considering, once you select the grayscale mode, you will not be able to contrary the colors once more even if you lot select the RGB fashion again.
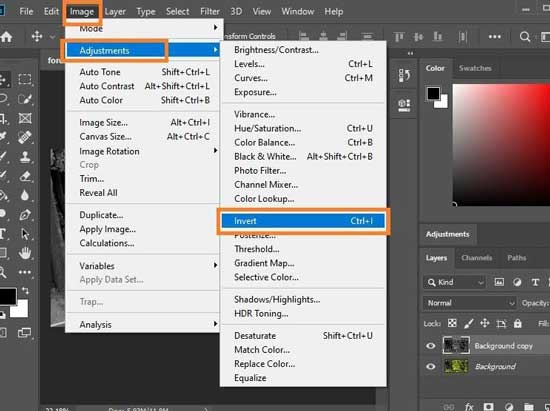
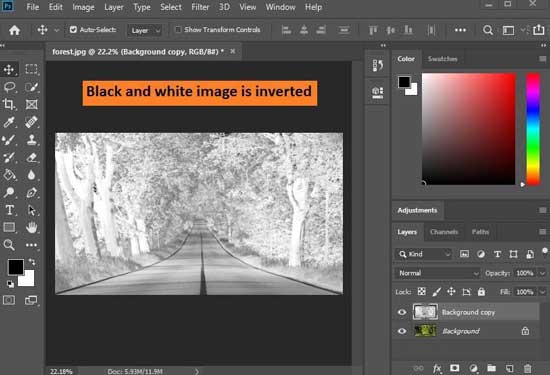
Step 4: Invert the blackness and white
Now we will capsize the black & white epitome.
To do that, become to the "Epitome" menu and then go to the "Adjustments" option. From the "Adjustments" option, You lot need to select the "Invert" selection. Alternatively, just press "CTRL+I" from the keyboard. The black & white colour of the image will exist inverted.
Footstep 5: Save your paradigm
To save the prototype, go to the "File" menu and select the "Save every bit" choice. A salve box will announced. From the box, rename your image and you lot tin can select either "JPEG" or "PNG" epitome format from the "Save as type" option. Then click the "Save" button.
Decision
Nosotros see how easily we tin invert the color in photoshop. Whoever thinks that it is very tough to do, we promise their misconception is cleared. It is super like shooting fish in a barrel to practise.
In this commodity we tried to focus on color inversion and it is our promise that we are able to aid yous. Regardless of beginner or professional, this commodity will certainly help to practise your work in photoshop very finer.

How To Invert Black To White In Photoshop,
Source: https://www.photoretouchhouse.com/invert-black-and-white-in-photoshop/
Posted by: ruedastakinguinks.blogspot.com
0 Response to "How To Invert Black To White In Photoshop"
Post a Comment